Welcome, spice harvesters and Fremen warriors, to our latest guide for Dune: Awakening! With the game client now installed on our rigs, we’re diving deep into the graphics settings to help you make the most of your journey across the deserts of Arrakis. Whether you’re marveling at the endless dunes, battling in a sandstorm, or admiring the glow of a spice deposit, these settings can transform your experience—or bog it down if you’re not careful. 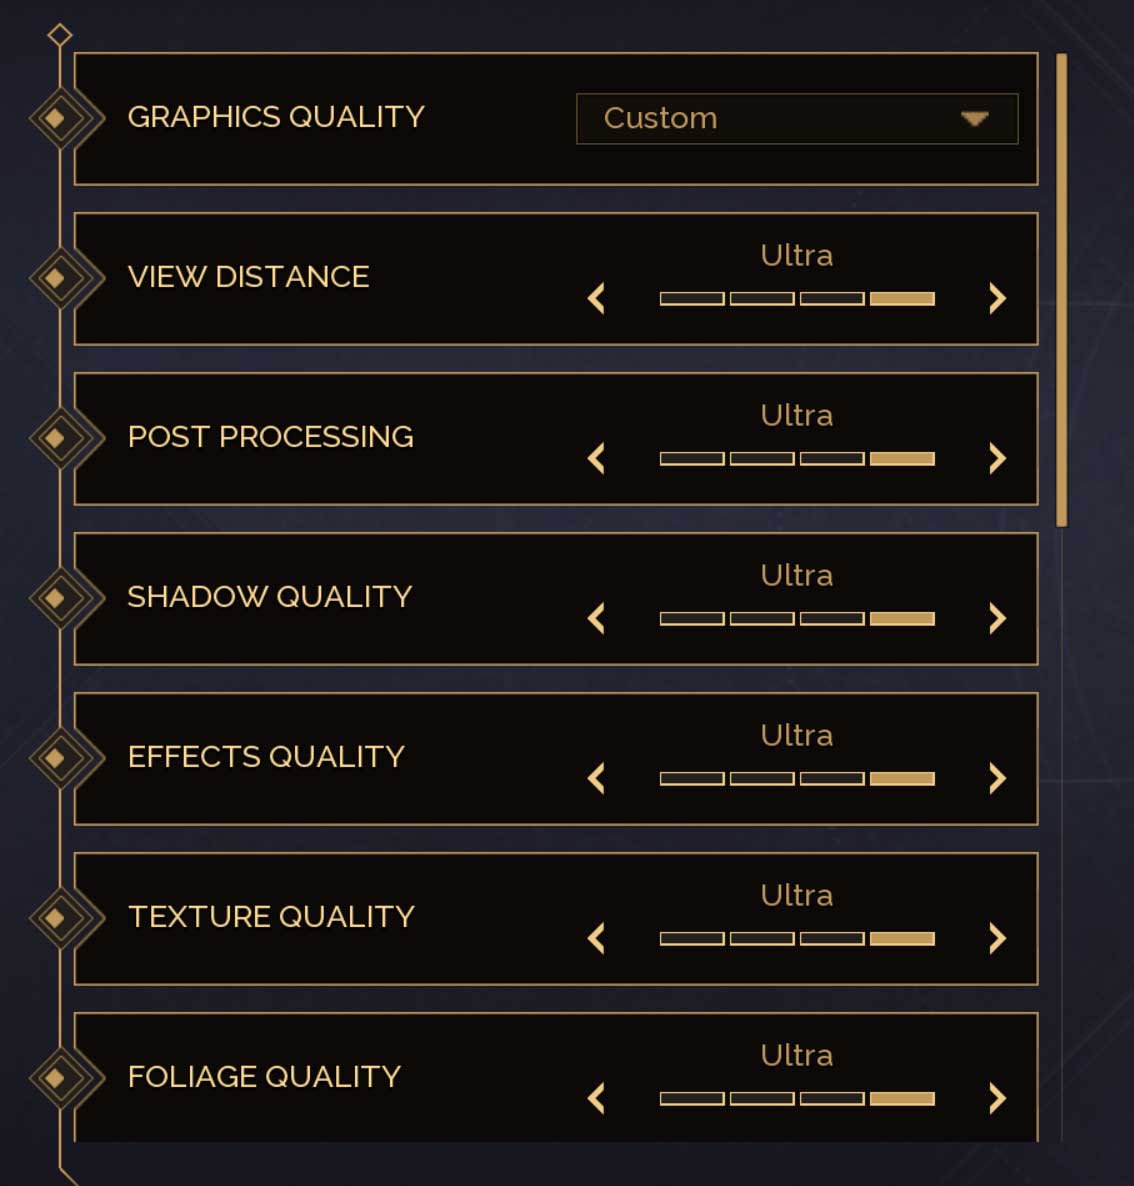
In this article, we’ll break down each graphics option, explain what it does, and how it impacts your game’s look and performance. From View Distance to Global Illumination, we’ve got you covered. So, grab your stillsuit, adjust your thumper, and let’s explore the visual sands of Dune: Awakening together!
Graphics Settings Explained
View Distance – Low, Medium, High, Ultra
What it does: View Distance determines how far into the game world you can see detailed objects, terrain, and characters before they either fade out or are replaced with simpler versions (like low-detail models or “pop-in”). In Dune: Awakening, this likely affects how far you can see across the vast deserts of Arrakis, including dunes, rocks, and distant structures.
- Low: Limits the draw distance significantly. Objects farther away may disappear or look very basic, which can help performance on weaker systems but might make the open world feel less immersive.
- Medium: A balanced option, showing more detail at a moderate distance without taxing your system too much.
- High: Extends the distance for detailed rendering, making the world feel larger and more alive—great for exploration fans.
- Ultra: Maximizes draw distance, letting you see fine details far across the horizon. Ideal for high-end PCs but demanding on hardware.
Post Processing – Low, Medium, High, Ultra
What it does: Post Processing covers visual effects applied after the main scene is rendered, like bloom (glow around lights), lens flares, motion blur, color grading, and ambient occlusion (soft shadows in crevices). In Dune: Awakening, this might enhance the hazy, sandy atmosphere or the glow of spice.
- Low: Minimal effects—less bloom, no motion blur, and simpler lighting. It looks clean but flat.
- Medium: Adds some effects like subtle bloom and basic ambient occlusion for depth.
- High: More pronounced effects—think glowing sandstorms or richer lighting contrasts.
- Ultra: Full cinematic treatment with intense bloom, detailed ambient occlusion, and atmospheric polish. Heavy on performance but gorgeous.
Shadow Quality – Low, Medium, High, Ultra
What it does: Shadow Quality controls the sharpness, detail, and accuracy of shadows cast by objects, characters, and the environment. On Arrakis, this could affect how sharp a sandworm’s shadow looks under the harsh sun.
- Low: Blocky, low-resolution shadows with limited range. Shadows might look jagged or disappear at a distance.
- Medium: Smoother shadows with better edges and a bit more range.
- High: Crisp, detailed shadows that extend farther, adding realism to scenes.
- Ultra: Ultra-sharp shadows with soft edges and long draw distances. Looks stunning but eats up GPU power.
Effects Quality – Low, Medium, High, Ultra
What it does: Effects Quality governs the detail of particle effects, explosions, weather (like sandstorms), and other dynamic visuals. In Dune: Awakening, this likely impacts spice explosions, storm particles, or combat effects.
- Low: Basic effects with fewer particles and less detail—sandstorms might look sparse.
- Medium: More particles and better clarity, making effects noticeable but not overwhelming.
- High: Rich, detailed effects—think swirling sand or vibrant spice clouds.
- Ultra: Maximum particle density and detail for immersive, cinematic effects. Great for spectacle but demanding.
Texture Quality – Low, Medium, High, Ultra
What it does: Texture Quality sets the resolution and clarity of surface details on objects, characters, and environments—like the gritty sand, rocky cliffs, or character armor in Dune: Awakening.
- Low: Blurry, low-res textures. Sand might look like a flat smear.
- Medium: Clearer textures with decent detail, good for mid-range systems.
- High: Sharp, high-res textures that make the world feel tactile and real.
- Ultra: Crystal-clear, ultra-detailed textures. Every grain of sand pops, but it requires lots of VRAM.
Foliage Quality – Low, Medium, High, Ultra
What it does: Foliage Quality controls the detail and density of vegetation or environmental clutter. While Arrakis is mostly desert, this might apply to sparse plants, debris, or scattered rocks.
- Low: Minimal detail—few objects, low-res models, and short draw distance.
- Medium: More objects with better detail, still optimized for performance.
- High: Dense, detailed foliage or clutter with farther visibility.
- Ultra: Maximum density and detail—every rock or twig looks lifelike. Less impactful in a desert but still taxing.
Hair Quality – Low, Medium, High, Ultra
What it does: Hair Quality affects the rendering of character hair (and possibly beards or fur). In Dune: Awakening, this could make Fremen hair or noble hairstyles look more realistic.
- Low: Flat, basic hair with little strand detail.
- Medium: Some strand definition, but still simple.
- High: Detailed, flowing hair with individual strands visible.
- Ultra: Highly realistic hair with fine strands and natural movement. Uses advanced tech like Unreal’s hair rendering, but it’s GPU-intensive.
Antialiasing & Upscalers – TAA, TSR, DLSS, FSR3
What it does: These options smooth jagged edges (antialiasing) and/or upscale the image to improve performance and quality. Here’s how they work:
- TAA (Temporal Anti-Aliasing): A traditional method that smooths edges by blending frames over time. Good quality but can blur motion.
- TSR (Temporal Super Resolution): Unreal Engine’s upscaling tech. Balances performance and quality by rendering at a lower resolution and upscaling smartly.
- DLSS (Deep Learning Super Sampling): NVIDIA’s AI-powered upscaling (RTX cards only). Renders at a lower resolution, then uses AI to sharpen it—great for performance and clarity.
- FSR3 (FidelityFX Super Resolution 3): AMD’s upscaling tech, open to most GPUs. Similar to DLSS but less AI-driven, offering solid performance boosts.
DLSS Upscaler Quality – Off, DLAA, Quality, Balanced, Performance, Ultra Performance
What it does: For NVIDIA users with DLSS, this fine-tunes the balance between image quality and frame rate.
- Off: No DLSS—native rendering only.
- DLAA: Focuses purely on antialiasing at native resolution, no upscaling. Best quality, no performance boost.
- Quality: High resolution with slight upscaling—sharp visuals, modest performance gain.
- Balanced: Middle ground—good quality and decent frame rate boost.
- Performance: More aggressive upscaling—smoother FPS, slightly softer image.
- Ultra Performance: Maximum upscaling for the highest FPS, but noticeable quality loss.
FSR3 Upscaler Quality – Native AA, Quality, Balanced, Performance, Ultra Performance
What it does: Similar to DLSS, this adjusts FSR3’s upscaling for AMD (and compatible) GPUs.
- Native AA: Antialiasing at native resolution—no upscaling, best quality.
- Quality: High-res upscaling with minimal quality loss.
- Balanced: A mix of good visuals and performance.
- Performance: Prioritizes frame rate over sharpness.
- Ultra Performance: Maximum performance boost, but the image may look soft.
Screen Percentage – (Slider 0 to 100)
What it does: This controls the internal rendering resolution before upscaling or output. For TAA and TSR, you can adjust freely (0-100%). For DLSS, it’s locked at 58%, and for FSR3, it’s 67%, as these rely on their own upscaling algorithms.
- Lower Values (e.g., 50%): Renders at a lower resolution, boosting performance but making things blurry.
- Higher Values (e.g., 100%): Native resolution—sharp but demanding.
Frame Generation – Off, AMD FSR3, DLSSG
What it does: Frame Generation creates extra frames to boost smoothness, even beyond your GPU’s raw output.
- Off: No extra frames—pure GPU rendering.
- AMD FSR3: AMD’s tech generates frames, improving fluidity on compatible GPUs.
- DLSSG (DLSS Frame Generation): NVIDIA’s version (RTX 40-series only), pairing with DLSS for silky-smooth gameplay. Both can add slight input lag.
Anti-Aliasing Quality – Low, Medium, High, Ultra
What it does: Fine-tunes the strength of edge smoothing when using traditional antialiasing (like TAA).
- Low: Minimal smoothing—jagged edges remain.
- Medium: Decent smoothing, balancing performance and quality.
- High: Very smooth edges with better detail preservation.
- Ultra: Maximum smoothing for near-perfect edges, but costly.
Global Illumination Method – Performance, Quality
What it does: Global Illumination (GI) simulates how light bounces around the environment. In Dune: Awakening, this could affect how sunlight lights up dunes or interiors.
- Performance: Faster GI method (likely screen-space or simpler ray tracing)—less accurate but easier on hardware.
- Quality: More realistic GI (possibly full ray tracing)—better lighting and shadows, but heavier.
Global Illumination Quality – Low, Medium, High, Ultra
What it does: Adjusts the detail of GI effects.
- Low: Basic lighting with minimal bounce effects.
- Medium: Some light bounce for added depth.
- High: Detailed, realistic lighting across the scene.
- Ultra: Maximum GI detail—think lifelike light in every corner. Very demanding.
Global Illumination Reflections Quality – Low, Medium, High, Ultra
What it does: Controls the quality of reflections tied to GI, like shiny surfaces or water (if any exists on Arrakis!).
- Low: Simple, low-res reflections.
- Medium: Clearer reflections with moderate detail.
- High: Sharp, detailed reflections.
- Ultra: Near-perfect reflections with full GI integration. Stunning but resource-heavy.
Finding Your Perfect Dune: Awakening Settings
Now that you’ve got the rundown on every graphics option in Dune: Awakening, it’s time to tweak those sliders and find your ideal setup. Whether you’re chasing jaw-dropping visuals, buttery-smooth frame rates, or just trying to survive on a low-end rig, we’ve got some suggestions to get you started. Here’s how to optimize your experience on Arrakis:
Best Settings for Quality/Look
If you’ve got a beefy PC and want Dune: Awakening to look like a cinematic masterpiece, crank these up:
- View Distance: Ultra – See every dune in glorious detail.
- Post Processing: Ultra – Sandstorms and spice glows will pop.
- Shadow Quality: Ultra – Crisp, realistic shadows under the sun.
- Effects Quality: Ultra – Maximum particle detail for immersive combat and weather.
- Texture Quality: Ultra – Every grain of sand and armor detail shines.
- Foliage Quality: Ultra – For whatever sparse clutter Arrakis offers.
- Hair Quality: Ultra – Fremen locks flow like the wind.
- Antialiasing & Upscalers: DLSS (Quality) or TSR – Sharp edges with minimal performance hit.
- Frame Generation: DLSSG or FSR3 – Smoothness without sacrificing quality (if supported).
- Global Illumination Method: Quality – Realistic lighting.
- Global Illumination Quality: Ultra – Lifelike light bounces.
- Global Illumination Reflections Quality: Ultra – Stunning reflections where they matter.
This setup is for high-end systems (think RTX 3080+ or equivalent) with plenty of VRAM and CPU power.
Best Settings for FPS
For those prioritizing smooth gameplay—crucial for combat and exploration—focus on performance:
- View Distance: Medium – Still immersive without overtaxing your GPU.
- Post Processing: Medium – Keeps some flair without the heavy hit.
- Shadow Quality: Medium – Decent shadows, less strain.
- Effects Quality: Medium – Effects are visible but not overwhelming.
- Texture Quality: High – Sharp enough without maxing VRAM.
- Foliage Quality: Medium – Less clutter to render.
- Hair Quality: Medium – Hair looks fine without the GPU cost.
- Antialiasing & Upscalers: DLSS (Performance) or FSR3 (Performance) – Big FPS boost with decent visuals.
- Frame Generation: DLSSG or FSR3 – Extra frames for fluidity.
- Global Illumination Method: Performance – Faster lighting.
- Global Illumination Quality: Medium – Balanced lighting detail.
- Global Illumination Reflections Quality: Medium – Reflections without the lag.
Perfect for mid-range GPUs (like an RTX 3060 or RX 6600 XT) aiming for 60+ FPS.
Best Settings for Low-End Computers
If you’re running on older or weaker hardware, these settings will keep Dune: Awakening playable:
- View Distance: Low – Cuts draw distance for better performance.
- Post Processing: Low – Ditches heavy effects.
- Shadow Quality: Low – Basic shadows to save power.
- Effects Quality: Low – Minimal particles, less GPU load.
- Texture Quality: Medium – Decent detail without VRAM overload.
- Foliage Quality: Low – Sparse desert clutter won’t bog you down.
- Hair Quality: Low – Simple hair rendering.
- Antialiasing & Upscalers: FSR3 (Ultra Performance) or TSR – Maximum upscaling for FPS.
- Frame Generation: FSR3 – If supported, for a smoother feel.
- Global Illumination Method: Performance – Lightweight lighting.
- Global Illumination Quality: Low – Bare-bones GI.
- Global Illumination Reflections Quality: Low – Minimal reflections.
This is tailored for low-spec systems (e.g., GTX 1650 or integrated graphics) to hit 30+ FPS.
Final Thoughts
There you have it, travelers of Arrakis—a full guide to mastering Dune: Awakening’s graphics settings! Whether you’re gazing at the horizon in Ultra glory, dodging sandworms at high FPS, or just trying to survive on a trusty old rig, these options let you tailor the game to your setup. Experiment with these settings, find your sweet spot, and let us know your favorite configs in the comments. Until next time, may your spice flow freely and your frames stay steady. See you in the dunes!